Using a Raspberry Pi to Hide from My ISP
Video Unavailable
Auto-cancelled after repeated failures: Unable to process the URL. Please verify it and try again.
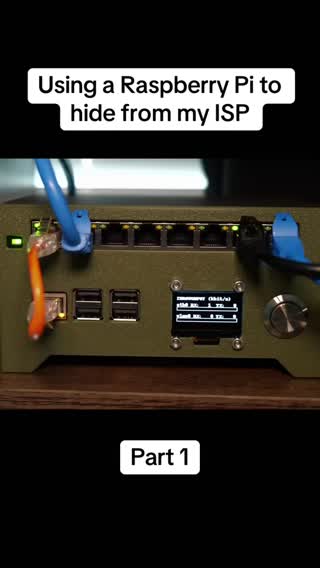
View OriginalThis is my brand new Raspberry Pi router. It connects to my apartment's Wi-Fi and forwards internet to all the devices behind it, hiding them from my ISP. But why am I hiding them from my ISP? So about a year ago my wife and I moved into our new apartment and they provide a community Wi-Fi solution. That means that you don't need to set up routers or modems, you can just connect your devices instantly. Now while this is great for the average resident, it means that I don't have the ability to configure my router and do any sort of networking things. So I haven't been able to connect to devices over Wi-Fi like Raspberry Pis, or update my 3D printers, or even host something like a Minecraft server. So I called up my ISP and I asked them if I could just connect my own router to the ethernet port in our apartment and just, you know, use that as an access point to share Wi-Fi to my devices. But they said that they scan the network and kick off anything that looks like a router, so that wasn't an option. Now I was pretty defeated, but I went ahead using a router offline for a few months just to connect with my 3D printers, but one day I decided that I had enough. I decided that I would figure out how to get around the no-router rule. Enter the Raspberry Pi. Raspberry Pis are small single-board computers that run Linux and can be used to do a variety of things. The first step was to choose an operating system for the Raspberry Pi. I decided to go with a headless version of Raspberry Pi OS. The lite version of Raspberry Pi OS doesn't come with a desktop environment, so there's a lot less processing to be done by the CPU on the Raspberry Pi, and it comes with about a gigabyte less of packages and stuff. After booting it up and connecting a keyboard and monitor, I got it connected to the Wi-Fi by using a tool called Network Manager. Using Network Manager, I was able to list all the available Wi-Fi networks and connect to our community Wi-Fi. I also used it to give the
Ethernet port of the Pi a static IP address, which will come in handy later. By the way, if you want to create your own Raspberry Pi router, check out my website spencersdesk.com. I've got all the project files and code there. Once I got connected to the internet, I unleashed the two most notorious commands known to Raspberry Pi users. Yeah, I updated the Pi. Once the Pi was updated, the next step was to install a tool called DNS Mask. This gives us the ability to create a DNS forwarder and a DHCP server. The DNS forwarder kind of acts like a DNS server, like Google or Cloudflare's. So when our Pi wants to reach out to a website like google.com, it sends that request to the DNS forwarder, which sends that to a DNS server, and then the DNS server says, oh, google.com is this IP address, and returns it to the DNS forwarder. The DNS forwarder will cache that IP address and then return the IP address to the device that requested it. And then in the future, every time someone requests google.com's IP address, the DNS forwarder has it cached, so it can return it much faster and doesn't have to reach back out to the DNS server. The DHCP server, on the other hand, is what is actually acting as our router. It's handing out IP leases and getting devices connected. With DNS Mask installed, I just needed to create a configuration file. First, I tell the DHCP server to only listen on the ethernet port, so it will only listen to devices that are physically connected to it. Next, I explicitly tell it not to listen on the wireless port. Next, I give the server a range of IP addresses that it can hand out. So I went with 10 to 100 for 12-hour leases. I think you can do anywhere from 2 to 255, but I wanted to reserve the first 10, and I don't see myself needing more than 100 devices, so I just went with 10 to 100. The final thing we need to configure with DNS Mask is the IP address for both the gateway and the DNS forwarder. The gateway is pretty much just the IP address of the
router. You can think of it as that. And then the DNS forwarder will also be the router's IP. So since we assigned that IP address to the ethernet port, we're just going to point the gateway and DNS forwarder to that ethernet port. So now when a device is connected to the Pi router, it will know that the Pi router's ethernet port's IP address is what it should be reaching out to. After finishing the configuration file for DNS Mask, I just restarted and enabled the DNS Mask service.
Summary
A Raspberry Pi is used to create a router that connects to community Wi-Fi, allowing devices to be hidden from the ISP. The setup involves installing a headless version of Raspberry Pi OS, connecting to Wi-Fi, and configuring DNS Mask for DNS forwarding and DHCP services. The configuration includes setting a static IP for the Ethernet port, defining IP address ranges for connected devices, and ensuring the DHCP server only listens on the Ethernet port.
Tags
Save videos. Search everything.
Build your personal library of inspiration. Find any quote, hook, or idea in seconds.
Create Free Account No credit card required